
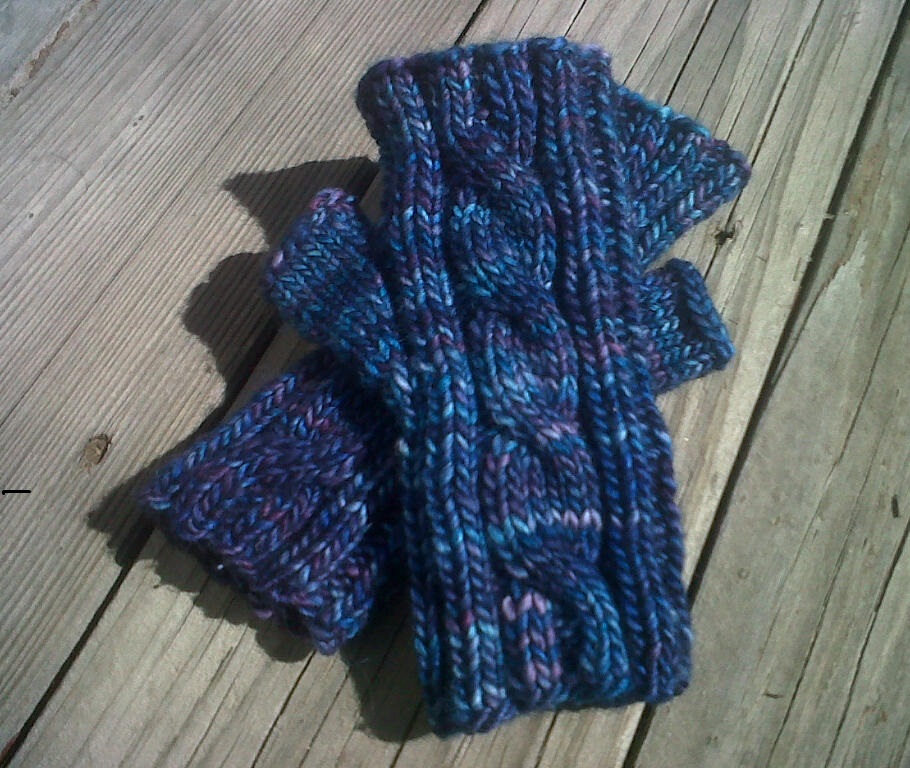
Materials
- Approximately 100 yards of worsted weight yarn. The mitts look great in handpainted yarns that are smooth or a rustic one-ply. My favorite yarns are Malabrigo Rios, Madelinetosh Tosh Merino, or Dream in Color Calm.
- Size 6 (4.0 mm) double pointed needles.
- 2 stitch markers
- 1 cable needle
- Waste yarn
- Yarn needle
Size
These mitts fit my small/medium sized hands well.
Gauge
This kind of depends on the yarn you use and how elastic the ribbing is. Slightly stretched ribbing, 8 stitches = 2”
Abbreviations
- CO: cast on
- K: knit
- C6B: slip three stitches onto a cable needle and hold to the back of the work. K3, K the three stitches from the cable needle.
- C6F: slip three stitches onto a cable needle and hold to the front of the work. K3, K the three stitches from the cable needle.
- PM: place marker
- M1L: put strand between two stitches over left needle from front to back. Knit into back of the loop.
- M1R: put strand between two stitches over left needle from back to front. Knit into the front of the loop.
- SM: slip marker
- BO: bind off
Thumb Gusset
- Round 1: PM, K1, M1R, K1, PM.
- Rounds 2-3: SM, K the stitches between the markers, SM.
- Round 4: SM, K1, M1R, K1, M1L, K1, SM. (There are now 5 stitches between the markers.)
- Rounds 5-6: SM, K the stitches between the markers, SM.
- Round 7: SM, K1, M1R, K3, M1L, K1, SM. (There are now 7 stitches between the markers.)
- Rounds 8-9: SM, K the stitches between the markers, SM.
- Round 10: SM, K1, M1R, K5, M1L, K1, SM. (There are now 9 stitches between the markers.)
- Rounds 11-12: SM, K the stitches between the markers, SM.
- Round 13: SM, K1, M1R, K7, M1L, K1, SM. (There are now 11 stitches between the markers.)
- Rounds 14-15: SM, K the stitches between the markers, SM.
- Next round: Place the 11 thumb stitches onto a piece of waste yarn using a needle while removing the markers. CO 2 stitches using backward loop method. K these two stitches in the following rounds of knitting.
Left Mitt
- Cast on 36 stitches. Divide the stitches evenly between the three needles (12-12-12) Join to knit in the round carefully, making sure to not twist the stitches.
- Rounds 1-4: Work in K2, P2 ribbing on all three needles.
- Round 5 – 8 : Begin cable pattern on 1st needle: K2, P2, K6, P2. Continue in K2, P2 ribbing on other 2 needles. Repeat for three more rounds.
- Round 9: Cable pattern on 1st needle: K2, P2, C6B, P2. Continue in K2, P2 ribbing on the other 2 needles. (Twist 1)
- Following 9 rounds: Needle 1: K2, P2, K6, P2. Continue in K2, P2 ribbing on other 2 needles. (The cable twists every 10th row of knitting.)
- Next round: K2, P2, C6B, P2 on 1st needle. Continue K2, P2 ribbing on 2nd needle. (K2, P2) twice, insert thumb gusset, P2 on 3rd needle. (Twist 2)
- Following 9 rounds: K2, P2, K6, P2. Continue in K2, P2 ribbing on other 2 needles working the thumb gusset at the same time on the 3rd needle.
- Next round: K2, P2, C6B, P2 on 1st needle. Continue K2, P2 ribbing on other needles while working the thumb gusset on 3rd needle. (Twist 3)
- Following 9 rows: K2, P2, K6, P2 on 1st needle. Continue K2, P2 ribbing on other needles while working the thumb gusset on 3rd needle. When the gusset is completed work K2 on the CO stitches to reestablish K2, P2 ribbing on this needle.
- Next round: K2, P2, C6B, P2 on 1st needle. Continue in K2, P2 ribbing on the other 2 needles. (Twist 4)
- Next 4 rounds: K2, P2, K6, P2. Continue in K2, P2 ribbing on other 2 needles.
- Next 3 rounds: K2, P2 ribbing on all three needles.
- Last round: CO loosely in pattern. As you cast off you create the 4th round of ribbing at the top of the mitt.
Right Mitt
Work exactly like the left mitt with these changes: 1. Replace each C6B with a C6F. This reverses the twist of the cable; it should be twisting towards the thumb. 2. Work the thumb gusset on the 2nd needle in this way: K2, P2, insert thumb gusset, P2, K2, P2. The 3rd needle will be ribbing on this mitt.
Finish Thumb
- Place the 11 stitches on the waste yarn back onto the needles and rejoin the yarn.
- Pick up and knit 4 stitches across the body of the mitt: 1 stitch before the 2 CO stitches, 2 in the CO stitches, and 1 after the CO stitches.
- Knit 5 rounds even.
- BO loosely.
You’re Done!
Each mitt has 4 ends that you will have to weave in. Do it!
What is blocking? Put on your mitts and go show them off!
