Winter is Coming: Knit Mitts!

It started for me one blustery winter day about 5 years ago. I made a quick trip in the car without wearing gloves and arrived at my destination with one finger dead white and numb. How bizarre, I thought. I went into the building, rubbed my finger until the circulation returned, and idly thought that I should mention it to my doctor the next time I saw her. I knew that it was Reynaud’s disease.

Over the years the Reynaud’s progressed to all of the fingers of my hands, and last year my toes joined the party. Instead of white my fingers now turn purple within seconds when exposed to cold.  Pain is involved. As it turned out, Reynaud’s was the harbinger of things to come; three months ago I was diagnosed with scleroderma (systemic sclerosis), but that is another story. Today’s story is one of blue fingers, cold weather, and the world’s cutest mitt pattern.

Scarf
I made this scarf using Dream in Color Smooshy with Cashmere. I had about three quarters of a skein left over. What better excure do I need for mitt knitting?

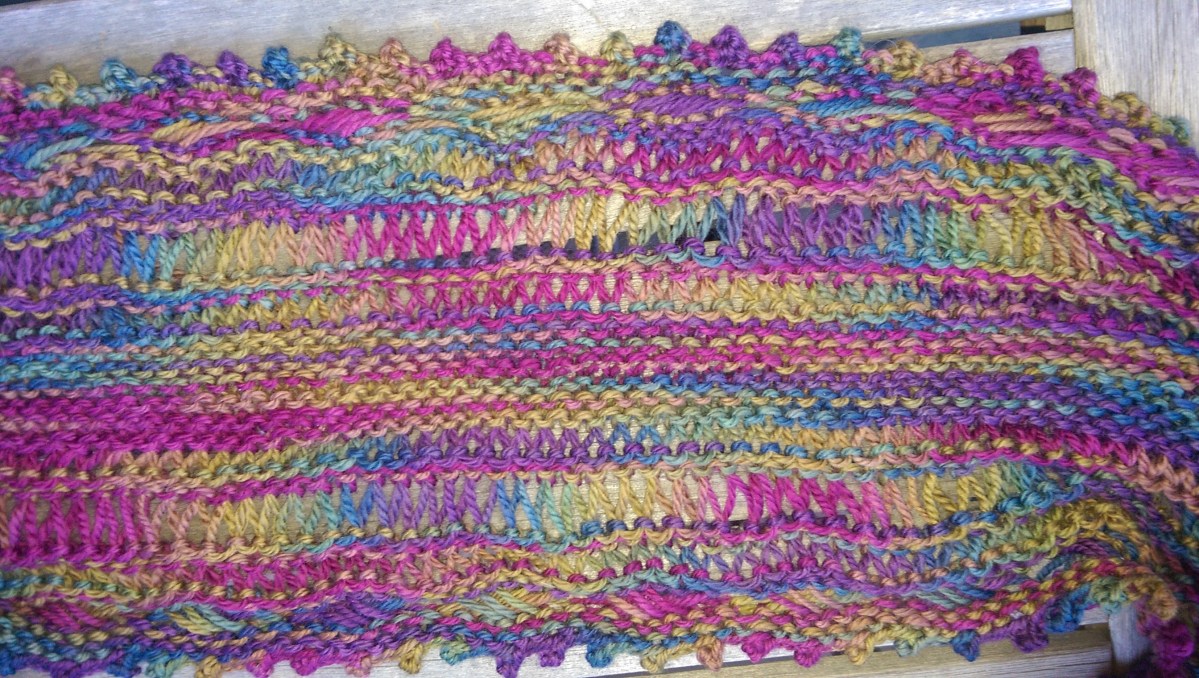
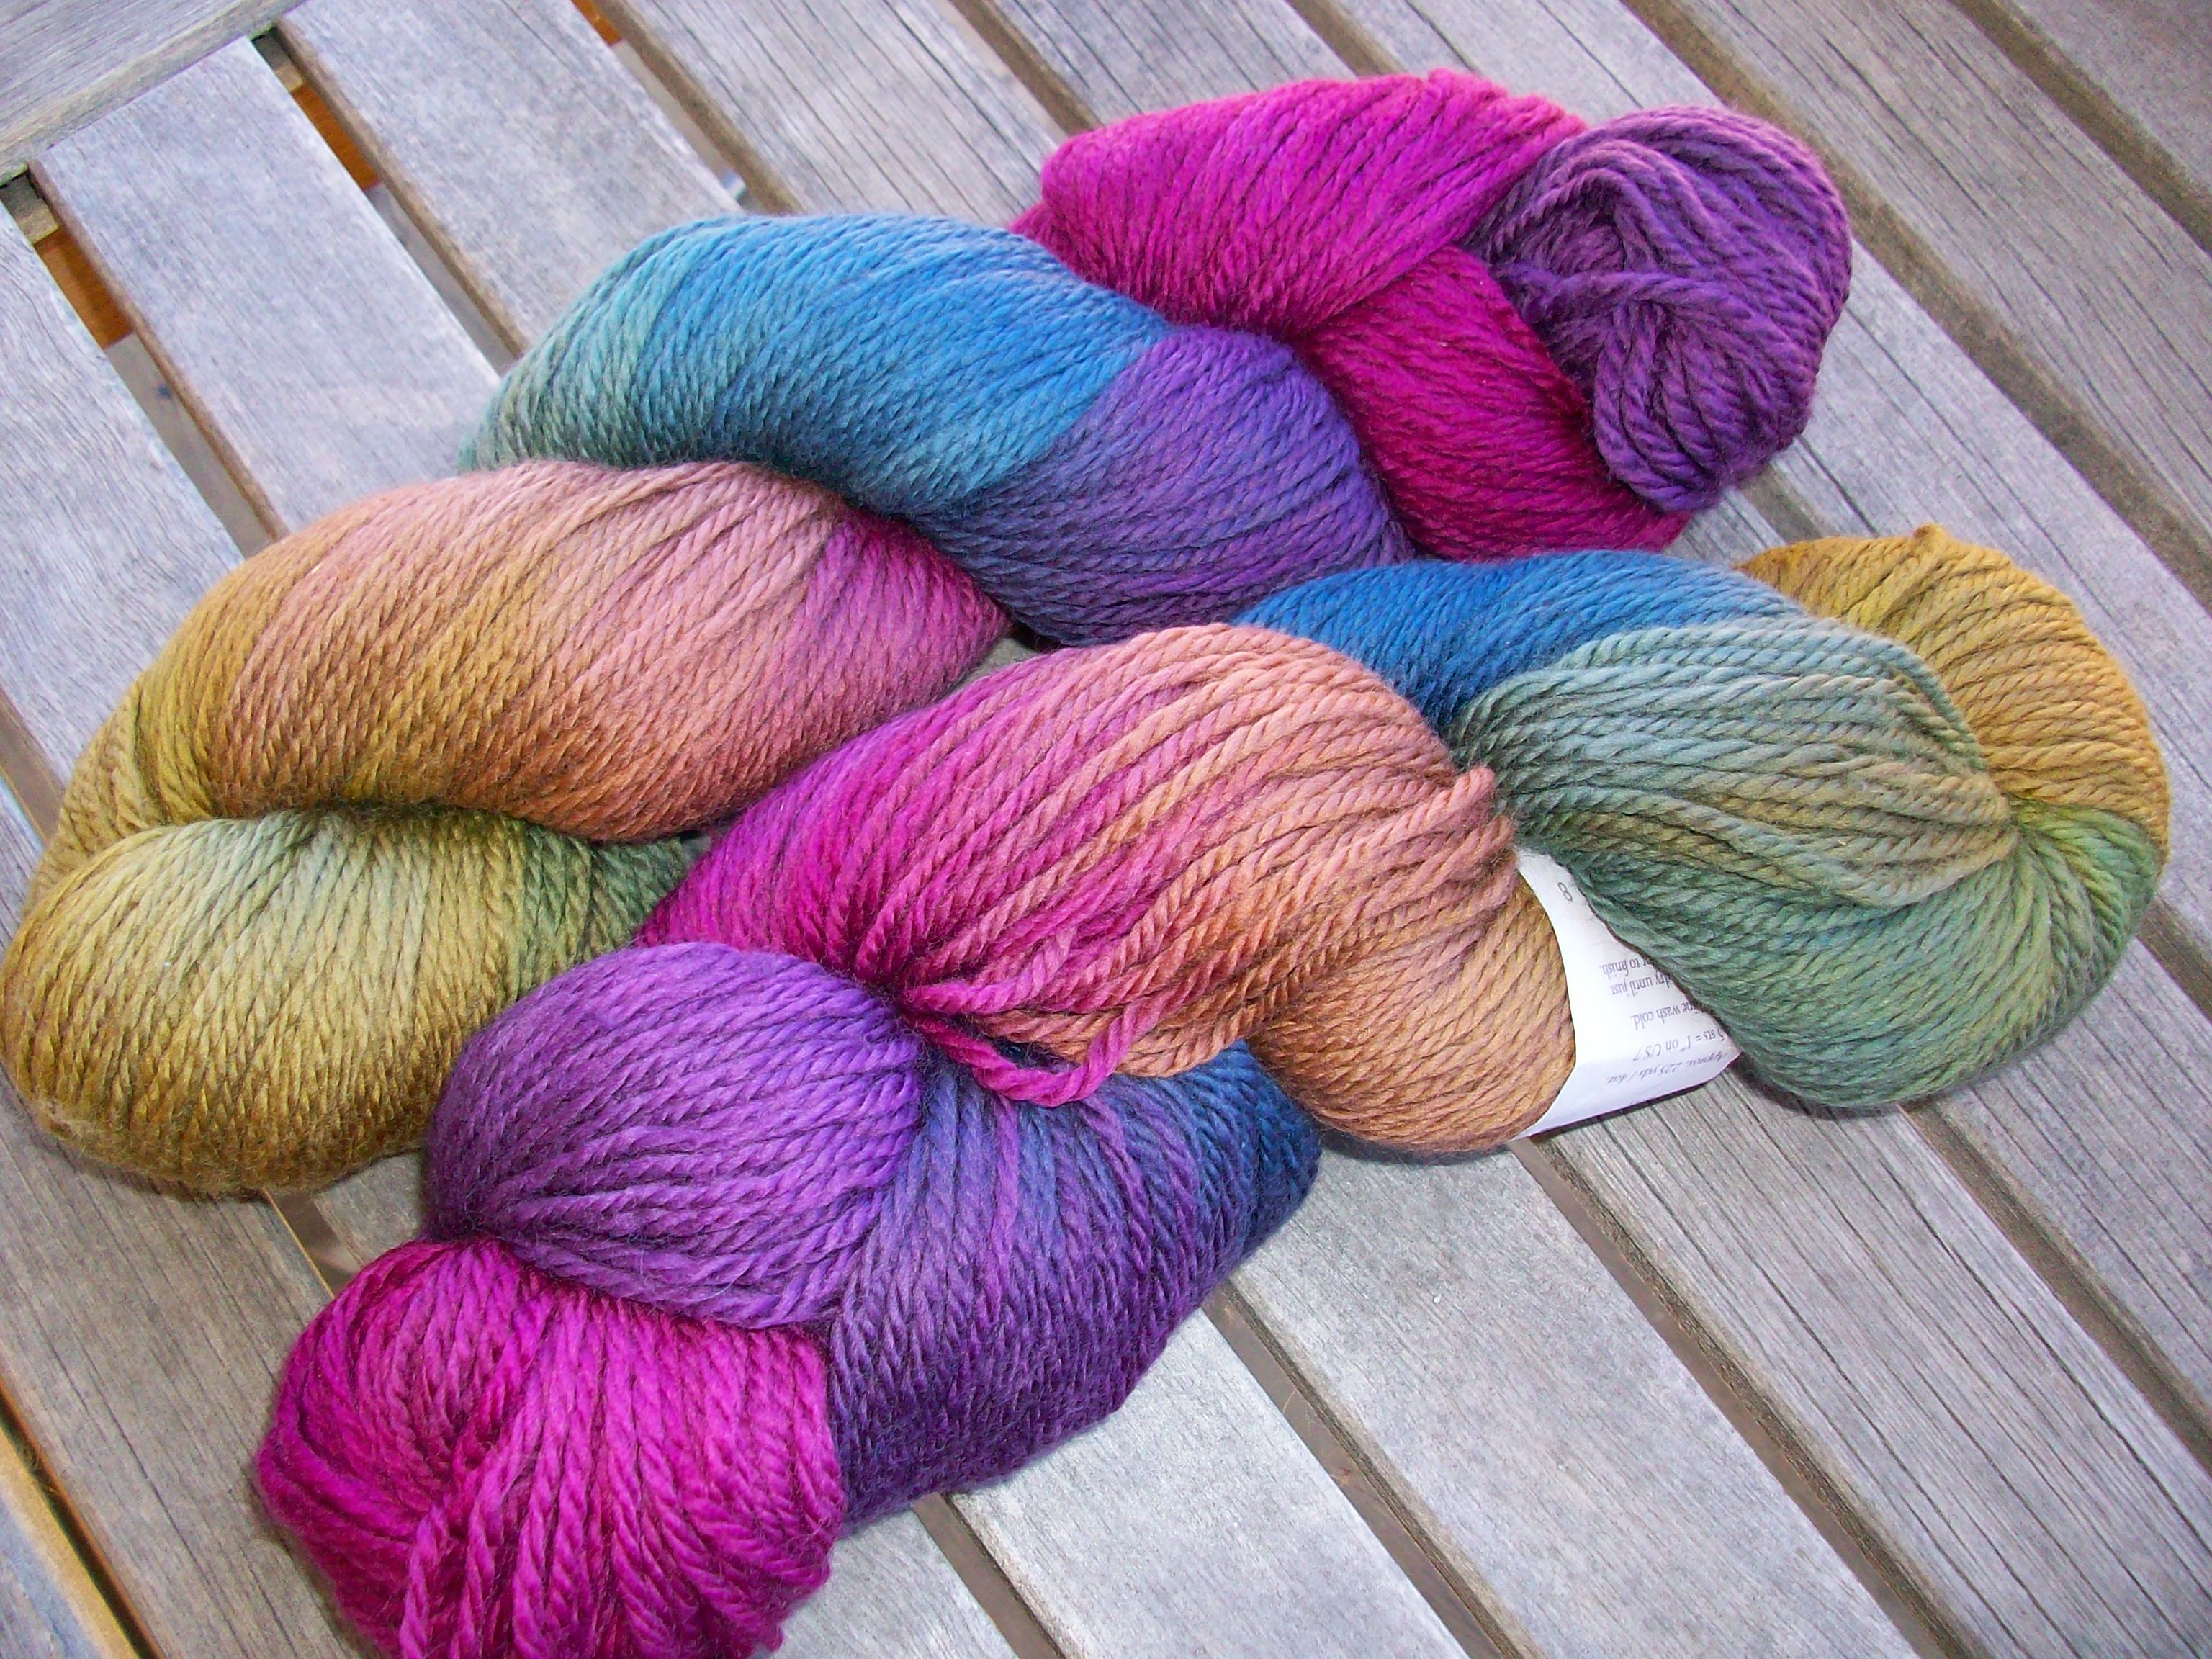
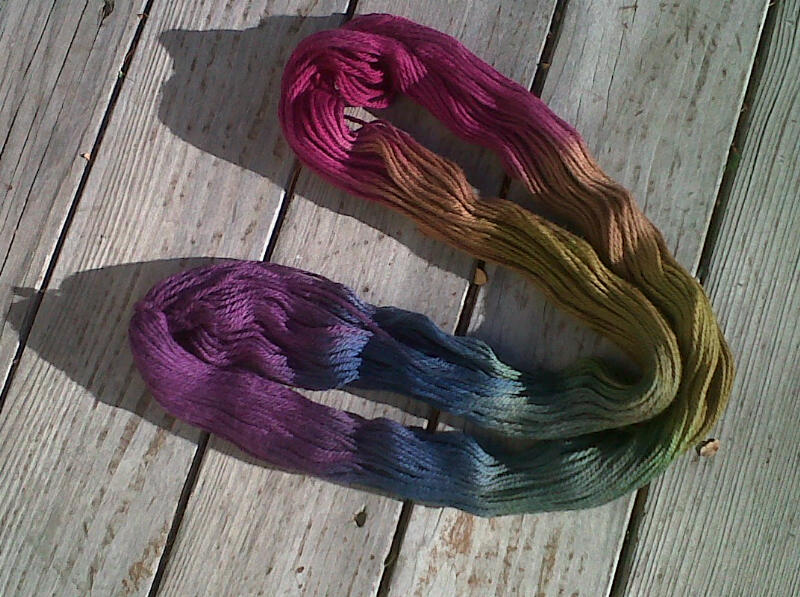
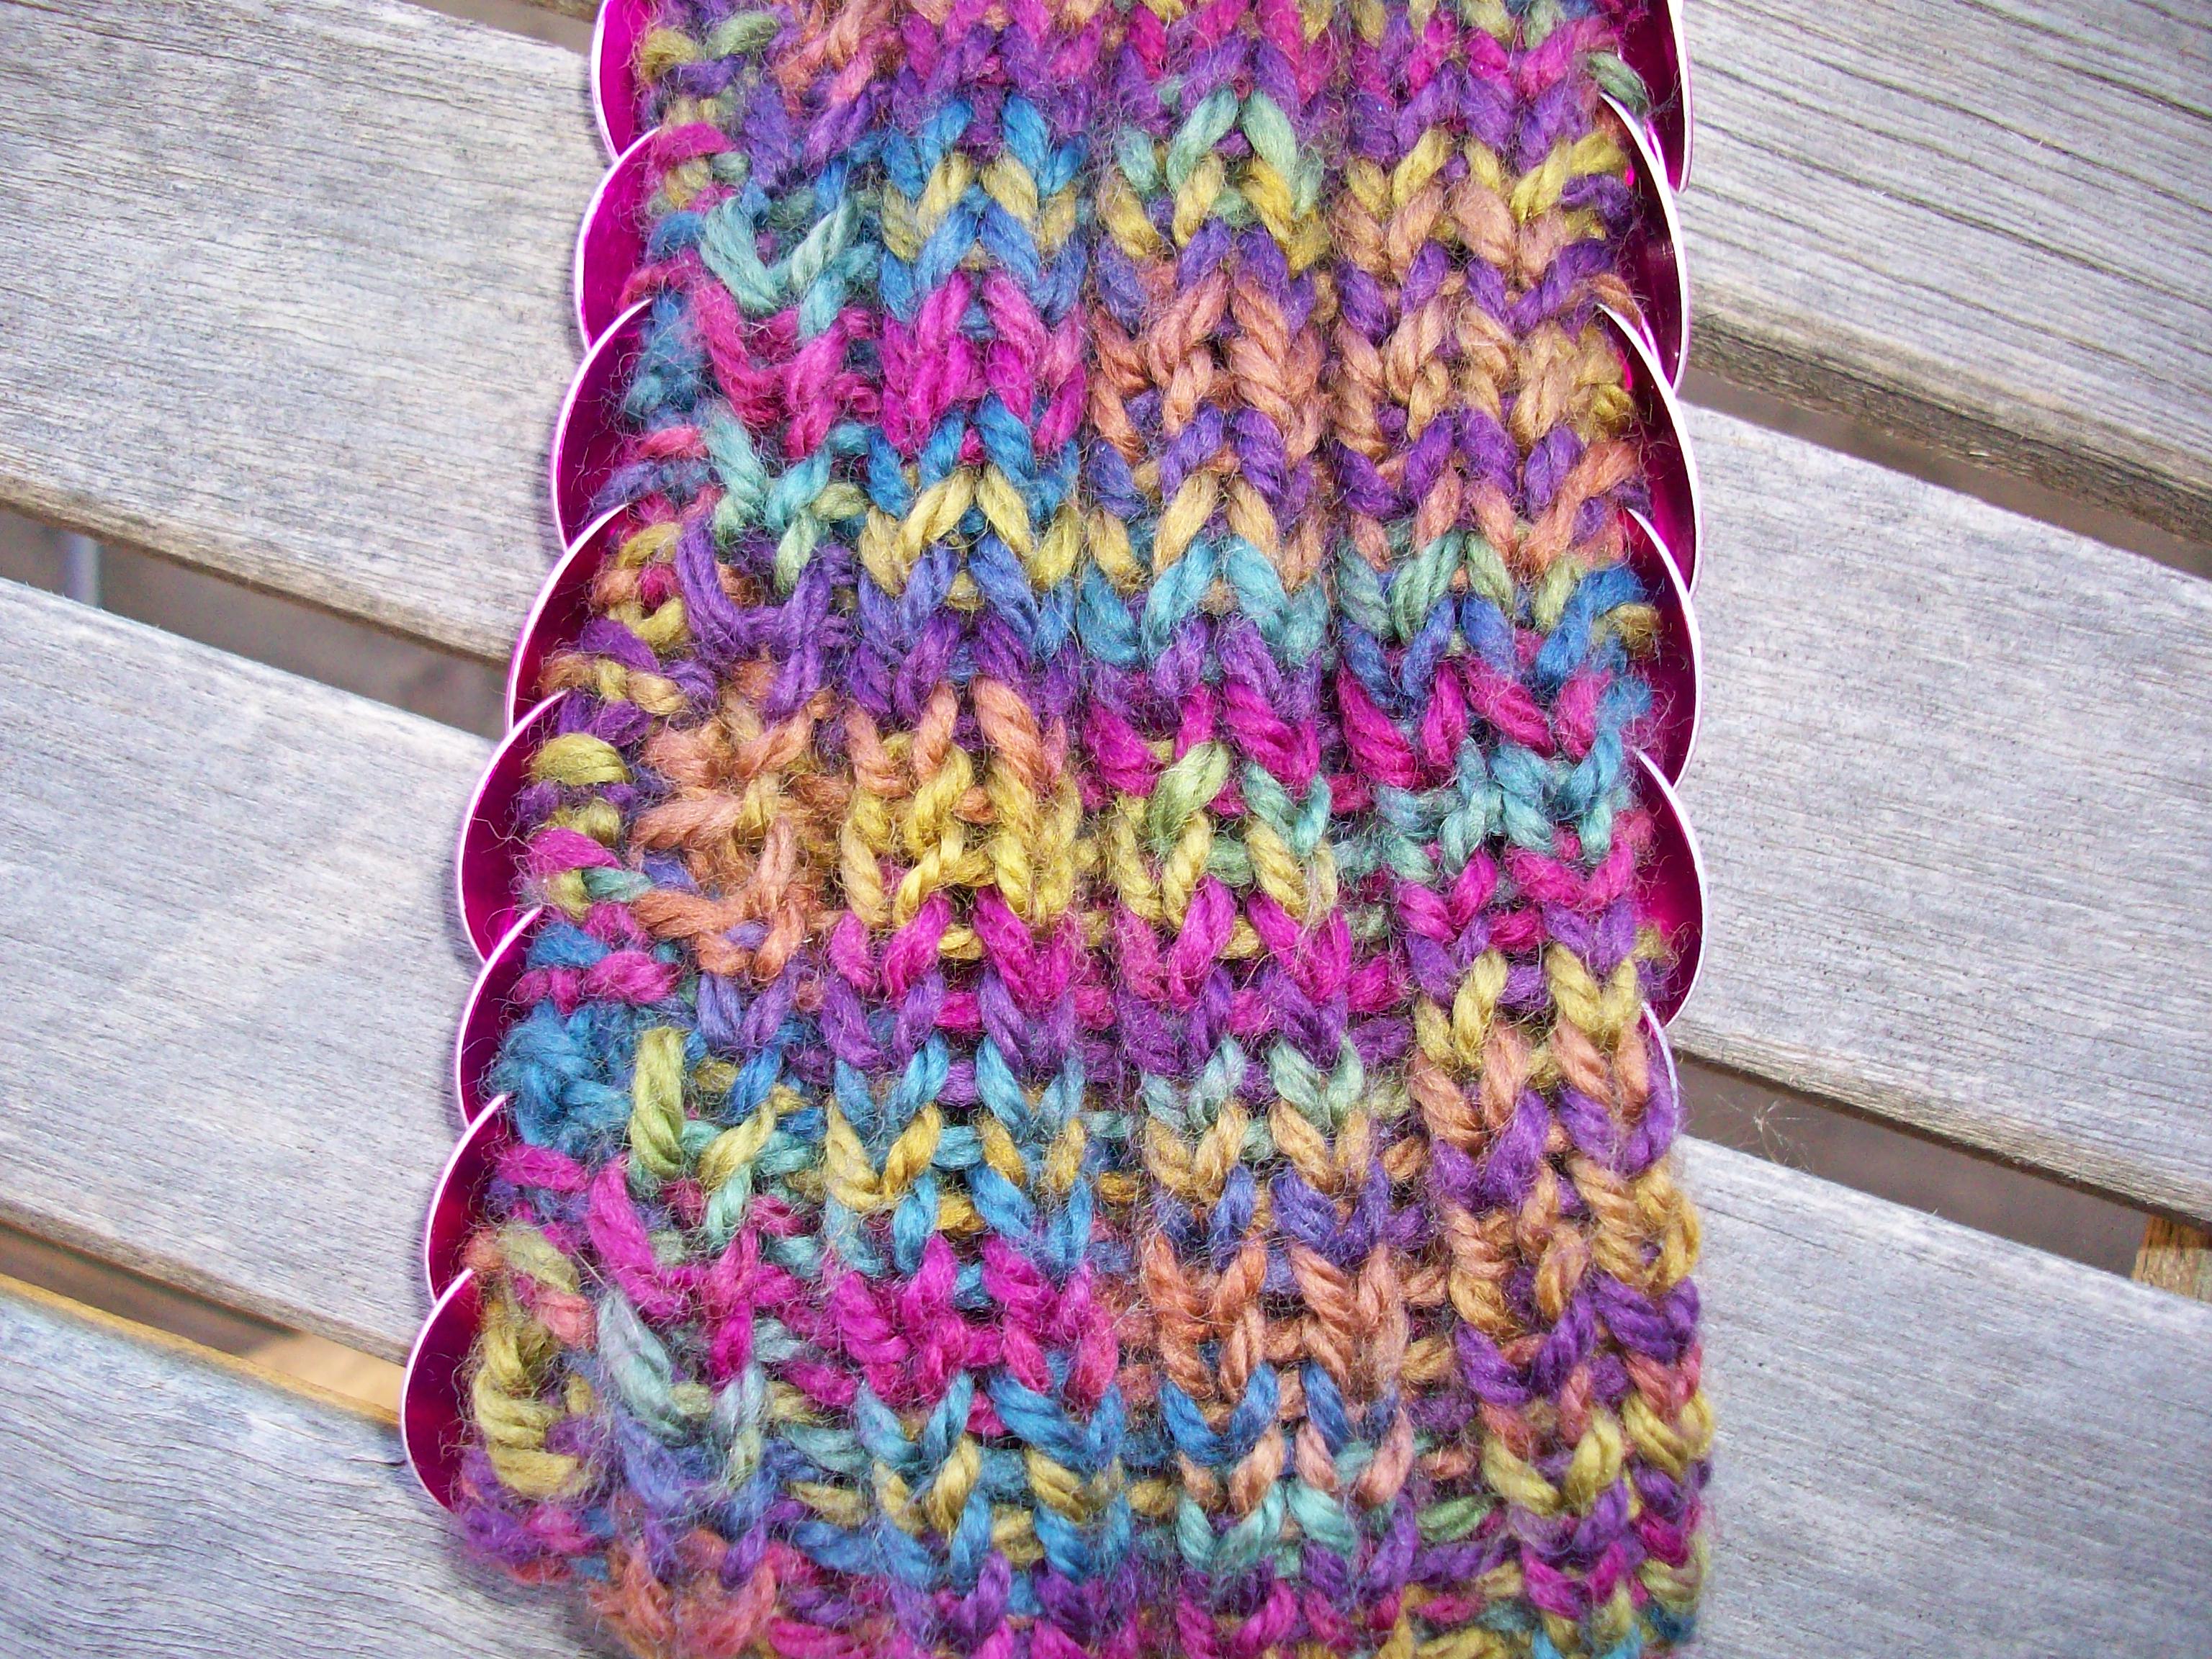
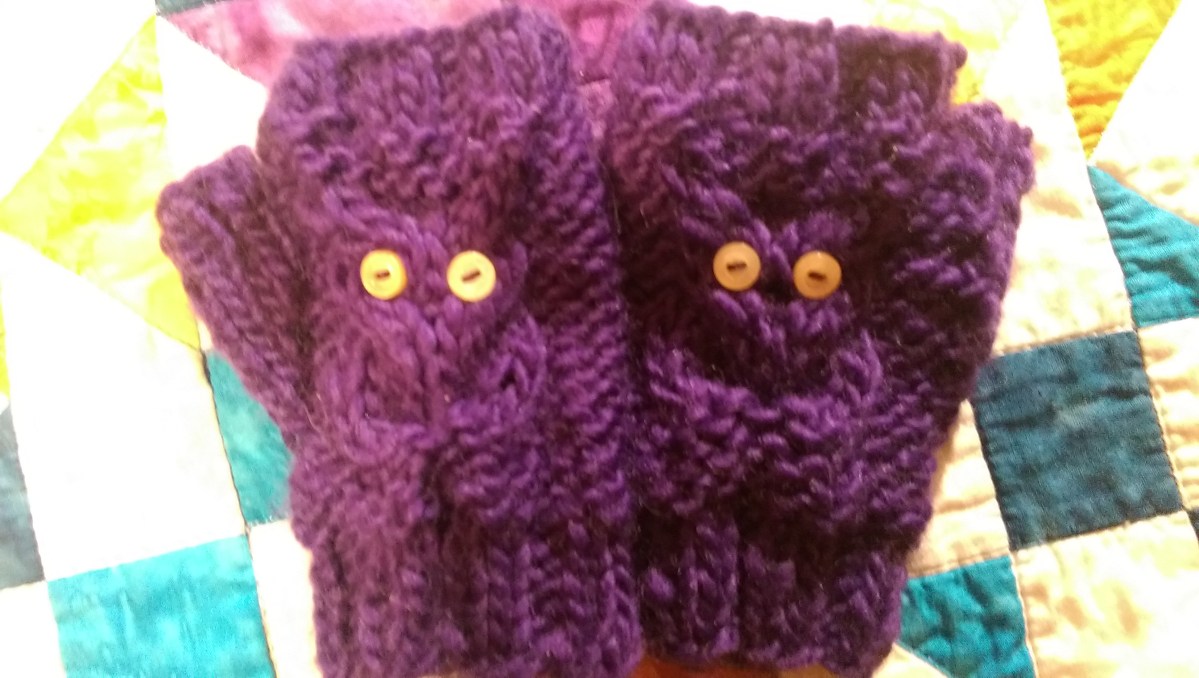
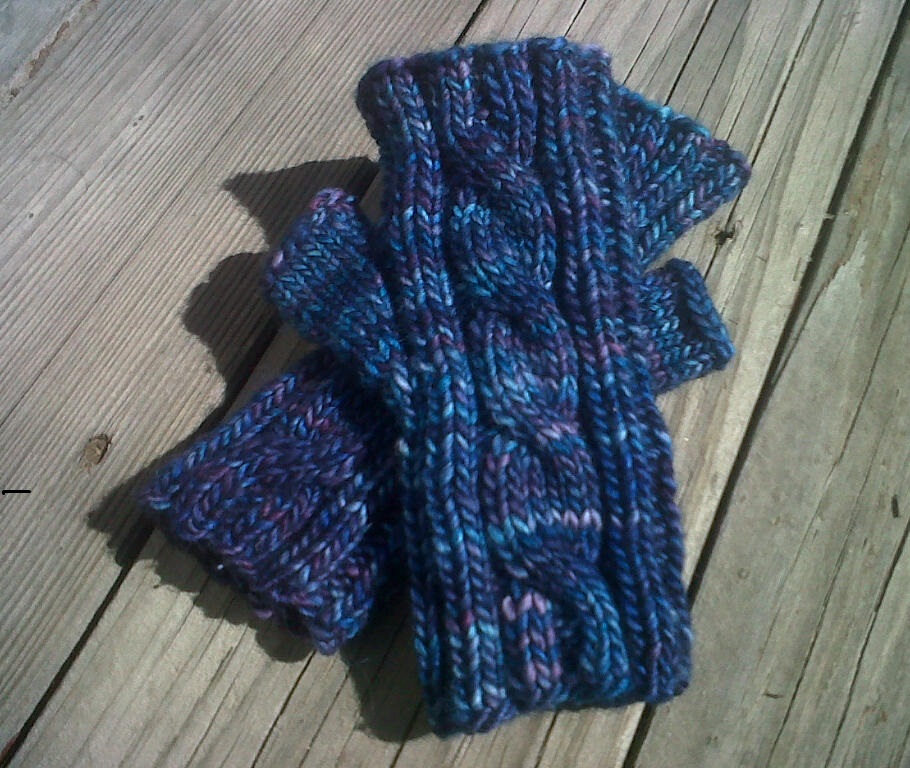
I made myself a sweet little scarf out of a cashmere blend sock yarn last winter. I had some yarn left over so I made a pair of lace mitts from it using the Sweet Pea Mitts pattern (by Lisa Swanson) in the book Lace One-Skein Wonders (edited by Judith Durant).

Lace Mitts
Mitts to match my scarf. Take that cold weather!

Yep, just as cute as the scarf. Since hand circulation is a problem for me I started the thumb lower on the mitt (starting at my wrist) so it wouldn’t pull across my hand. This mitt is nice because the I-cord bind-off keeps the stitches at the top of the mitt firmly in place across my knuckles. Because they are light in weight I can wear them indoors while reading, knitting, and working in the house. Gee, wouldn’t it be nice to have some more of these…?

Mitts
Look at what I’ve been making from leftover sock yarn, 🙂

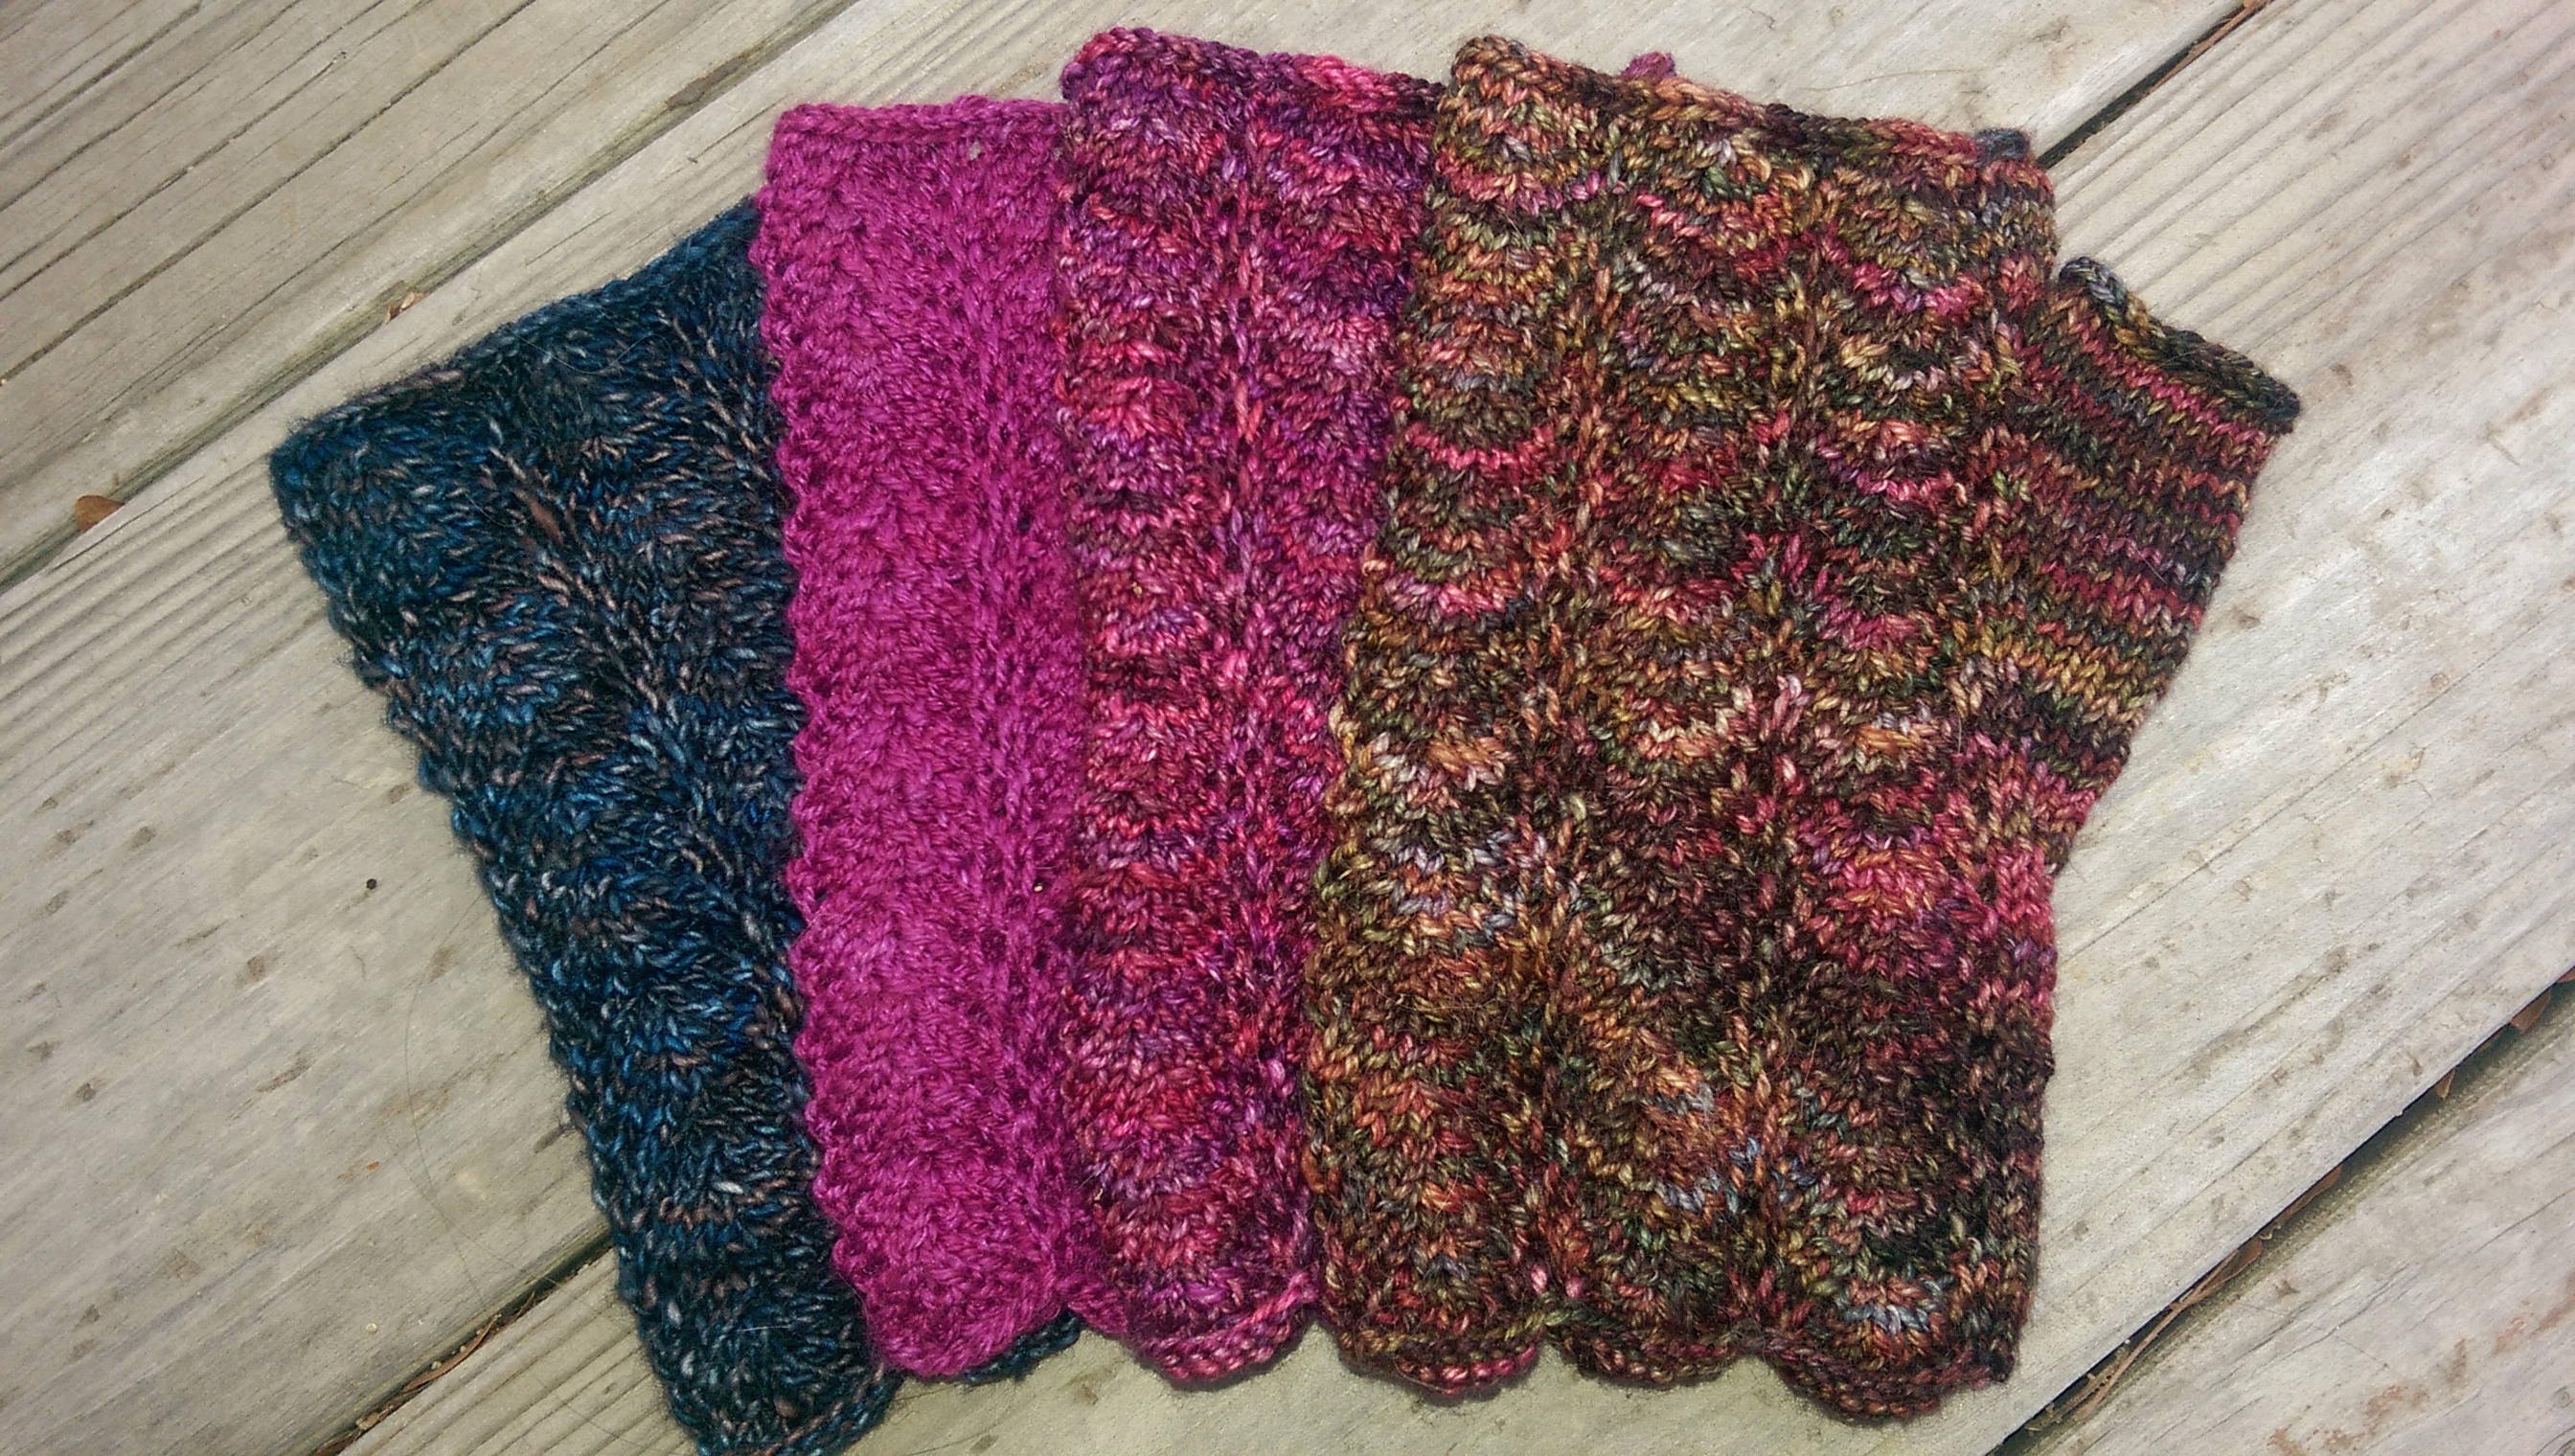
It was stunningly cold this November in Colorado. I went crazy with the mitt knitting. I now have three more pairs to match other shawls and tops in my wardrobe, and I am even sleeping in them. I wore them inside my mittens while shoveling snow, and they protect me from the cold steering wheel in the car.  I can even wear them on top of light gloves. Take that Reynaud’s!!

Oh yeah. Maybe some Christmas presents were also produced.


A Yarn’s Tale

I bought this fabulous yarn one day while shopping at a yarn store that I love in Denver. It was in colorway called Watercolor, and it does have that look that comes with the watercolor prints that I like to hang on my walls.

Handpainted yarn
How can skeins like these be left in the yarn store? Of course they had to come home with me!

I wasn’t sure what I would do with it, but the colors sure looked like ones that would go with a lot of the things in my wardrobe, so I bought it to add to my stash. I don’t quite know why I do these things, they just happen. The yarn stash gets hungry, and I feed it. 🙂

So here’s the yarn once I opened up those skeins.

Open skein of dyed yarn.
Once I got the skein opened i could see how the dye had been applied to the yarn.

Hmmm… this could be something of a problem for me. This yarn is one that has been hand painted in discrete areas. I like the pink and the purple, but the other colors will occur twice for each time I reach one of my favorites.  I really have been disappointed by yarn painted like this pooling in the past, so I decided to try the yarn out in some crazy dragon scale mitts that I wanted to make for fun. (I bought this pattern at Mew Mew’s Yarn Shop while doing Yarn Along the Rockies last year) The magenta in the yarn matched my dragon scaes, so how could I go wrong? The ribbing pattern will break up the colors so that they don’t pool. That’s cool, isn’t it?

Dragonpaw mitts
Here’s the mitts, The scales worked in really cute and you can hardly see the yarn,
Ribbed back of mitts
It’s a good thing that the front with the scales is cute, because I really think that this ribbing does not display the yarn well!

Well, that was something of a disaster. I wanted to break up the colors, but this is a mish-mash of all the colors at once! I bought this yarn for the magenta and purple colors, and what I notice most while wearing it is the gold and tan. I hunted around to find another pattern.

Garter mitts
How fun are these? These mitts are knitted sideways and use short rows for the shaping,

These mitts are knitted sideways in garter stitch, and I like how the colors are displayed better. With this yarn I do want some pooling after all. The garter stitch makes it a little broken up, but in a good way. I still had a couple of skeins of the yarn left, but without a good pattern for them they hibernated in my yarn stash all this year.

Last weekend I knitted a cowl in a fall colorway (my post Weekend in October Cowl if you would like to check that out), and as I finished it I kept thinking that it would be a good project for the Watercolor yarn. There is a lot of garter stitch going in the cowl, and the areas of wrapped and crossed stitches highlight colors well. Since the purple and magenta areas of the yarn are longer, they will display more in the openwork sections of the knit. I put on a picot bind-off again to add a little more color pop to the work.

Stitch detail of the cowl
Look at how the garter and wraps show off the colors of the yarn. No pooling allowed!
Finished cowl
Finished object on my favorite model. The cowl is long enough to wrap twice around my neck.

Happy, happy, happy. Can’t wait for the weather to get colder so I can wear this cowl and the one I made last weekend. Yesterday we set a new heat record, but this is Colorado, so maybe by next week…

Yarn: Lorna’s Laces Shepherd Worsted Multi  (18: Watercolor)

Dragonpaw mitts: Pattern acquired from Colette Smith 

Garter Stitch Mitts: pattern by Ysolda Teague

Cruzado Cowl: pattern by  Laura Nelkin for Dream in Color


Owls for Eleanor Part 2: Safe Landing in California

A couple of weeks ago I made some little owl mitts for my grand-niece Elly who sustained an injury to her hand that required surgery. I got the mitts done and into the mail just in the nick of time. Here’s how things went down.

Cast coming off.
Elly heading out to get her cast off. This is the first time she’s seen the injury since she landed in the ER. Did you notice that she loves purple?


Mail delivery
Not long after getting home the mail delivery brings her a package!


Mitts!
Perfect landing! Owls have arrived.


Best timing ever. Enjoy the mitts little lady and keep safe.

Love,

Aunt Marilyn

Owls for Eleanor

My grandniece Elly suffered a medical misadventure a couple of weeks ago that landed her in the ER with a badly cut and mangled finger. Wouldn’t you know it, not only was it badly cut, but the bone was also broken. The next morning she was taken into surgery for the repair and ended up with a purple cast. Sad, sad day.

Heading into surgery
Here she is heading into surgery…
After surgery
and here she is afterwards. See the purple cast?

The cast comes off in about a week, and I decided to make her some little purple fingerless mitts to wear as a little padding for that hand. She is into owls in a big way, so of course the mitts had to feature knitted owls.

Elly3_Cropped
Here they are, ready to fly to California. Hope they bring a little TLC to that finger!

These were a fast knit. I cast on 28 stitches and got started Friday and finished today. I used a bulky single ply yarn from Crystal Palace and size 7 and 9 needles. They go into the mail Monday, and I hope that she will like them. 🙂

Elly looking at her mitts on the blog.
Elly discovering her mitts in the blog this morning. Look Mom! I’m in a blog!!

Morning update. I texted Elly’s mom this morning to let her know about the finished mitts and the blog posting. She likes them!

UFO Rescue: Week 1

Monday I waded into the pile of UFOs that I had located in my big hunt last week, and pulled out two projects that I thought I could finish fairly quickly. I’ll be honest: I was motivated by needle recovery more than anything else. These two items are pretty easy to knit, so I thought I would be able to work on them while watching television.  Here they are.

Ugly MItts

I really liked this yarn when  bought it. It’s a single ply yarn that is soft, soft, soft. I liked it so much that I  bought two skeins and cast on to make a pair of mitts right away.

Yarn for the mitt
Malabrigo Worsted yarn in the colorway “Deja Vu”

The mitts did not show off the yarn very well. I knitted one mitt thinking that maybe the next one would look better. Nope. Not so much. I lost heart and quit about halfway through the second mitt.

Mitts with ugly yarn.
I decided that the yarn on these mitts was just too ugly to go on.

Well, enough is enough! Time to face the UFO pile down! I made myself a nice caramel latte, put some cookies on a plate by the latte mug and then pulled the mitts out of the storage bag. There, that wasn’t so bad. I finished knitting the second mitt while reading (so it wouldn’t be too painful), and then took them out for their picture. Funny, I was wearing a pink top and some moss green pants, and the mitts actually looked kind of nice. I’m thinking of maybe keeping the second skein of yarn and might make a cowl from it. It sure is soft yarn…

Finished Ugly Mitts
Finished mitts. They aren’t all that I hoped for when I bought the yarn, but they look better to me now than they did. 🙂

Bronco Baby Booties

I started these booties using yarn dyed by Luna Grey Fiber Arts in Denver Bronco football colors a few weeks ago, and then put them aside while knitting some fun socks for myself. The trouble is that the booties use the same size double-pointed needle (2.25 mm) as most of my socks. Since I just finished those origami socks (June Beetle), I decided to complete the booties while the needles were free. These are square needles, and I just love them as my hands never get tired and the stitches come out looking really even.

Baby booties made from the family pattern in Denver Bronco team colors.

I kind of like knitting these booties as they remind me of my grandma, and I got them done this morning while it was raining outside. Yeah! Two UFOs moved to the finished objects pile.

Only 14 more UFOs to go…

If anyone else has been inspired to attack their UFO collection, let me know what you are working on. This is kind of fun.  🙂

Darwinian Mitts


knitted mitts
Soft squishy mitts that have a good fit, sport a stylish cable and can be machine washed. What more can you want?!

Materials

  • Approximately 100 yards of worsted weight yarn. The mitts look great in handpainted yarns that are smooth or a rustic one-ply. My favorite yarns are Malabrigo Rios, Madelinetosh Tosh Merino, or Dream in Color Calm.
  • Size 6 (4.0 mm) double pointed needles.
  • 2 stitch markers
  • 1 cable needle
  • Waste yarn
  • Yarn needle

Size
These mitts fit my small/medium sized hands well.

Gauge
This kind of depends on the yarn you use and how elastic the ribbing is.  Slightly stretched ribbing, 8 stitches = 2”

Abbreviations

  • CO: cast on
  • K: knit
  • C6B: slip three stitches onto a cable needle and hold to the back of the work. K3, K the three stitches from the cable needle.
  • C6F: slip three stitches onto a cable needle and hold to the front of the work. K3, K the three stitches from the cable needle.
  • PM: place marker
  • M1L: put strand between two stitches over left needle from front to back. Knit into back of the loop.
  • M1R: put strand between two stitches over left needle from back to front. Knit into the front of the loop.
  • SM: slip marker
  • BO: bind off

Thumb Gusset

  1. Round 1: PM, K1, M1R, K1, PM.
  2. Rounds 2-3: SM, K the stitches between the markers, SM.
  3. Round 4: SM, K1, M1R, K1, M1L, K1, SM. (There are now 5 stitches between the markers.)
  4. Rounds 5-6: SM, K the stitches between the markers, SM.
  5. Round 7: SM, K1, M1R, K3, M1L, K1, SM. (There are now 7 stitches between the markers.)
  6. Rounds 8-9: SM, K the stitches between the markers, SM.
  7. Round 10: SM, K1, M1R, K5, M1L, K1, SM. (There are now 9 stitches between the markers.)
  8. Rounds 11-12: SM, K the stitches between the markers, SM.
  9. Round 13: SM, K1, M1R, K7, M1L, K1, SM. (There are now 11 stitches between the markers.)
  10. Rounds 14-15: SM, K the stitches between the markers, SM.
  11. Next round: Place the 11 thumb stitches onto a piece of waste yarn using a needle while removing the markers. CO 2 stitches using backward loop method. K these two stitches in the following rounds of knitting.

Left Mitt

  1. Cast on 36 stitches. Divide the stitches evenly between the three needles (12-12-12) Join to knit in the round carefully, making sure to not twist the stitches.
  2. Rounds 1-4: Work in K2, P2 ribbing on all three needles.
  3. Round 5 – 8 : Begin cable pattern on 1st needle: K2, P2, K6, P2. Continue in K2, P2 ribbing on other 2 needles. Repeat for three more rounds.
  4. Round 9: Cable pattern on 1st needle: K2, P2, C6B, P2. Continue in K2, P2 ribbing on the other 2 needles. (Twist 1)
  5. Following 9 rounds: Needle 1: K2, P2, K6, P2. Continue in K2, P2 ribbing on other 2 needles. (The cable twists every 10th row of knitting.)
  6. Next round: K2, P2, C6B, P2 on 1st needle. Continue K2, P2 ribbing on 2nd needle. (K2, P2) twice, insert thumb gusset, P2 on 3rd needle. (Twist 2)
  7. Following 9 rounds: K2, P2, K6, P2. Continue in K2, P2 ribbing on other 2 needles working the thumb gusset at the same time on the 3rd needle.
  8. Next round: K2, P2, C6B, P2 on 1st needle. Continue K2, P2 ribbing on other needles while working the thumb gusset on 3rd needle. (Twist 3)
  9. Following 9 rows: K2, P2, K6, P2 on 1st needle. Continue K2, P2 ribbing on other needles while working the thumb gusset on 3rd needle. When the gusset is completed work K2 on the CO stitches to reestablish K2, P2 ribbing on this needle.
  10. Next round: K2, P2, C6B, P2 on 1st needle. Continue in K2, P2 ribbing on the other 2 needles. (Twist 4)
  11. Next 4 rounds: K2, P2, K6, P2. Continue in K2, P2 ribbing on other 2 needles.
  12. Next 3 rounds: K2, P2 ribbing on all three needles.
  13. Last round: CO loosely in pattern. As you cast off you create the 4th round of ribbing at the top of the mitt.

Right Mitt

Work exactly like the left mitt with these changes: 1. Replace each C6B with a C6F. This reverses the twist of the cable; it should be twisting towards the thumb. 2.  Work the thumb gusset on the 2nd needle in this way: K2, P2, insert thumb gusset, P2, K2, P2. The 3rd needle will be ribbing on this mitt.

 Finish Thumb

  1. Place the 11 stitches on the waste yarn back onto the needles and rejoin the yarn.
  2. Pick up and knit 4 stitches across the body of the mitt: 1 stitch before the 2 CO stitches, 2 in the CO stitches, and 1 after the CO stitches.
  3. Knit 5 rounds even.
  4. BO loosely.

You’re Done!
Each mitt has 4 ends that you will have to weave in. Do it!
What is blocking? Put on your mitts and go show them off!


Evolving a Better MItt

I love mitts. I have fat little hands with stubby fingers, and they get cold easily. Mitts are the perfect things for me to wear while reading in bed, working at the computer, working in a cold garage (where all the teacher stuff is stored), or driving in the car on cold days. I even pull them over my mittens when it is really nasty out and I have to shovel snow. They are fast to make, and because they are small I feel OK using some luxury type yarns on them like cashmere blends. They are a fun way to try out new yarns and colors to see how they will work out. I love hand-painted yarns, but sometimes they don’t look the way I think they will knitted up. Mitts are the perfect way to sample without making a big investment.

I found a mitt pattern that was simple but nice on Ravelry.  It was ribbed in K2, P2 ribbing with a single cable on the back of the hand. I grabbed my needles, cast on and knitted the mitt.

Image
Don”t these look cute? They just didn’t fit right!

Oops! The knitting seemed too loose. The cable twisted over too great a distance and wouldn’t stay on the back of my hand. The thumb gusset was too short, and my thumb didn’t have a comfortable range of motion without pulling on the mitt. The mitts were just too dang long on my arm. But I still liked the idea of the pattern.

Image
These mitts pulled on my thumb and the cable just wouldn’t stay on the top of my hand. Not what I wanted!

Obviously, there needed to be some changes. If you consider the original pattern to be the code (DNA) for the mitts, I was introducing mutations into the code with each change. I started knitting again with more stitches on smaller needles. I started the gusset lower on the mitt so that it would start exactly at my wrist and would be in the same place as the twist of the cable. I slowed down the rate of increases; instead of adding two stitches every other row I tried adding stitches every third row. The gusset was moved over so it would begin in the middle of a K2 rib, and after a couple of false starts I had something that looked good to me.

Image
I knitted the thumb gusset by making increases inside one of the K2 ribs.

I liked where I was going with the mitt, but I kept on mutating the pattern. I shortened up the ribbing sections at the bottom and top of the mitt so that the mitt would have more room for cable action. I moved the start of the thumb gusset over so that there would be more stitches on the top of the mitt and fewer on the palm; the tension of the stretched palm rib stitches held the cable in place on the other side of the mitt.

Image
The ribs on the palm are more stretched, creating tension to hold the mitt in place.

I made the cable twist every 10 rows so I could get three twists onto the cable. Now I had about 6 new pairs of mitts, but I had managed to create the pattern for a mitt that I just loved. Natural selection had evolved me a better mitt!

This is the basic design of the mitt that evolved over a number of weeks as I kept trying out new variations of the pattern.

Image

I love this mitt! Did I mention that I wear them while reading? I can also knit them while reading (but not quickly!) I’m now working on writing up the pattern (or the genetic code for this mitt…), which is harder than it looks. 🙂