All week I’ve been getting ready for the holiday tomorrow. The turkey is in the fridge (and at exactly 2pm tomorrow afternoon he will slide into the oven!), the pies are on the counter, and the rest of the fixings are patiently resting in the fridge. All the cleaning is done except for the last minute vacuuming (hello… cats!), and even the stash has become organized. Through all of this I have also been churning out long mitts that are also arm warmers. It’s cold now. I need arm warmers!!

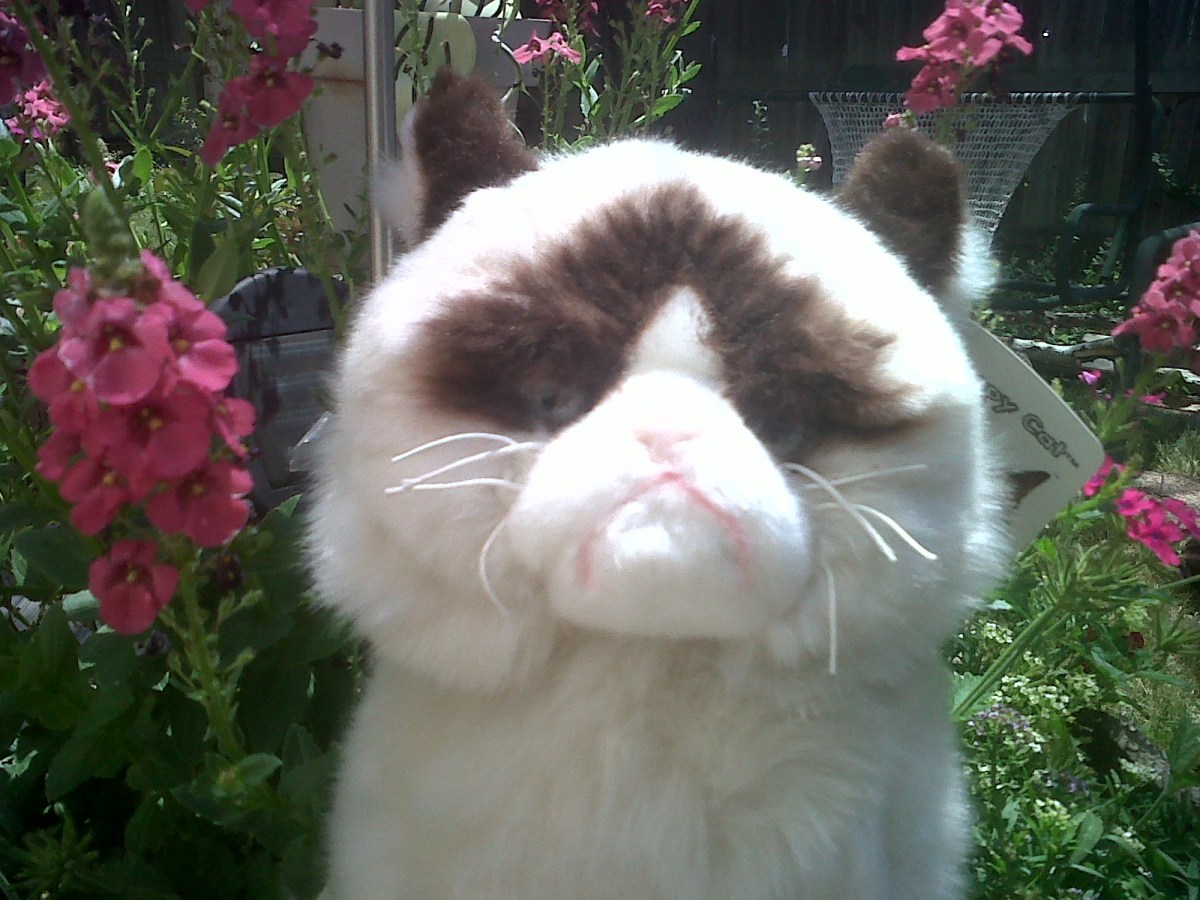
I have Raynaud’s syndrome; when I get cold I lose circulation to my hands, feet and even my face. It can happen really quickly, too. Look at what happened to me while shopping in the produce section of the grocery store last night!

During the winter I cope by wearing lots of simple layers that can be easily adjusted to adapt to changing conditions. Since I’m a knitter I have lots of socks, hand warmers, and shawls that I can layer on with reckless abandon. Seriously, I’m a walking knitwear advertisement in cold weather. I’m thinking about leg warmers for under my jeans and for my arms… arm warmers!!
The perfect product would be simple arm warmers that could be pulled down over my hands and fingers if I need it (so I put in a slit for my thumb), but could also be worn pulled up my arms to keep my hands free for household tasks like when I’m working with water or cooking (with cold things from the fridge). The warmers also needed to be long enough to pull up my arm, but should also be able to just bunch around my wrist. Snug enough to slide under sweaters, but loose enough to slip over gloves. Multi-purpose warmness. Take that, winter!
So here there are. I’ve made three pairs so far and I have another pair on the needles. I am just rocking these guys.

As you can see, I have many things to be thankful for. My hands aren’t great (thanks, scleroderma), but they work for knitting, and because I knit I’m in better shape than most other patients with my condition. I have Raynaud’s, but because I knit I am able to create product that help me beat it into submission. I am knitting in a time of absolutely fabulous Indy dyed yarns that make me happy with every single stitch. The fabulous colors in the yarn mean that even a simple stockinette item looks great. I am thankful. Very, very thankful.
Hey, maybe you would like some mitts too! Here’s the pattern.
Arm Warmer Mitts
Needles: size 1 (2.25 mm) double point or cable needles. I used 2 16″ cable needles and split the stitches between them. Adjust my directions to fit your needle choice.
Yarn: Fingering or sock yarn. These mitts each took about 250 yards.
Right Hand:
1. CO 72 stitches using Old Norwegian CO or any other CO that you are fond of. It needs to be a little stretchy. Join in the round with 36 stitches on each of 2 16″ circular needles. Mark the start of the round.
2. Complete K1P1 ribbing for 12 rounds.
3. Knit rounds in stockinette until mitt length is 4.5 inches from the CO.
4. Decrease: K5, K2tog, PM, K1, SSK, K rest of the round. (70 stitches)
5. K rounds for another 1.5 inches.
6. Decrease: Knit until 2 stitches before mark, K2tog, SM, K1, SSK, K rest of the round. (68 stitches)
7. K rounds for another 1.5 inches.
8. Repeat steps 6 and 7 once, and then step 6 once more. (64 stitches)
9. Thumb opening: turn the work at the end of the round and purl back on the WS to the start of the round. (remove the mark when you come to it). Turn the work again and knit the RS to the start of the round. Continue turning the work and working rows in stockinette (purl on the WS, knit on the RS) until the thumb gap is 2.0 – 2.5 inches long; check fit on your hand and knit until you like the size of the gap. End with a RS row.
10. Return to knitting rounds. Knit one round, closing the gap for the thumb.
11. Complete K1P1 ribbing for 11 rounds.
12. CO in K1P1 pattern making sure it won’t be too tight around your fingers when worn.
Left Hand:
Complete steps 1-3 as for right hand.
4. Decrease: K 62 stitches (10 stitches left in the round) K2tog, PM, K1, SSK, K to end. (70 inches)
5. K rounds for another 1.5 inches.
6. Decrease: K until 2 stitches before the mark, K2tog, SM, K1, SSK, K to end of round.
7. K rounds for another 1.5 inches.
8. Repeat steps 6 and 7 once, and then step 6 once more. (64 stitches)
9-12. Same as for the right hand.
Weave in the ends. Add buttons or other embellishments to mark the tops of the mitts if you wish.

Happy Thanksgiving everyone! May your day be a good one, and stay warm!